Sunday, December 21, 2014

Fence Trap

After scouring over 400 posts on this blog I cannot for the life of me find one on trapping the ball against the back fence to improve service toss and point of contact. How can I have overlooked this? It's a tried-and-true technique for improving serve, no matter the age or ability of the player.

You will need a fence or wall 2-3 feet taller than your player. Stand sideways next to the fence/wall with your non-dominant foot touching the fence/wall and your tossing arm closest to fence/wall. Toss ball as if you were going to hit an overhand serve, so ball needs to be 2-3 feet higher than your head, or about as high as player can reach with racquet. Trap ball against fence with racquet.

Players will soon find this is easier to do with a good quality toss out in front of them (which hopefully they have perfected by doing the Tap N Toss activity). Tossing behind them pretty much makes this impossible.

Once player is comfortable with this, have them turn 180 degrees and face the net, or move to the actual baseline. Visualizing the fence trap activity (now imagining the fence at the baseline), have them try tossing and 'trapping' the ball. Since there is no fence/wall in their way now, they should have a pretty good quality point of contact at the baseline.

Notes: if you are using a fence, avoid the support poles. Very hard on the racquet.

Here's a video of one of my Red Ball students performing the activity:


Also here's a great article from about.com listing some other common-sense strategies for improving the serve.

Tuesday, December 16, 2014

Two and One

Another great drill from the folks at Tweener, this one taking it up a notch to combine consistency AND directional skills. Love it!

Coach feeds first ball to player cross court. Player must return two balls cross court, then one ball down the line. Coach then sends this DTL ball cross court, and player repeats sequence, now from other side of court.

Some options on adapting this drill for a group clinic of young beginners:

Place a colored spot or cone on each half of court on coach's side, say, red on deuce and green on ad. As they are hitting back to you, call out the color they are supposed to be targeting. Perhaps include side of court ( Red - Deuce! Green - Ad!) so they begin to understand where they are hitting to without the cone markers. Player stays in until they miss. Player hitting most balls in a row within a given time period, wins.

Relay style: Players hit one ball and move to end of line (hit-n-git!). Group is working together to see how many balls in a row they can hit to the correct spot.

Progression: Start this activity hitting from service line, then move back to baseline as students master it.

Thursday, December 11, 2014

One Minute Challenge

Thanks to the folks at the new tennis app, Tweener, for this simple yet effective consistency drill idea. I tried to embed the actual video but no worky, so try clicking on that link instead.

Players have one minute to hit 40 balls in play. In the video, the player is rallying with the coach. Player gets one point for every ball hit in. The catch is: they can only use one ball. So hitting consistently is key to keeping a rally going and eliminating wasted time chasing down the ball.

For young players you want to avoid anyone standing around waiting in line, even though it is only for one minute. If you have multiple courts available, great - have them pair up and play this challenge in singles half (longways) or full court. If you don't have multiple courts available, consider shortening the time period to 30 seconds, again to avoid lines and waiting. For young beginners I would also eliminate the 40 number and perhaps reduce it or just have the challenge be for who can get the most balls hit in play in the set time period.


Sunday, November 30, 2014

Feed the Need: Tournament Fuel Strategies

I have already blogged about off-court advance preparation for playing a multi-day tournament. But I am often asked by parents about what their players should eat during the event. Naturally this depends on the player, but the same common sense fuel strategies that apply to other sports will also work for tennis.

Hydration and Electrolytes
WATER!! Water is so important for all of us humans, regardless of our fitness level. Be sensible. Encourage your child to never pass up an opportunity for a drink of water. Specifically I am thinking
of getting a drink 'on the switch', when players switch ends of court after every odd number of completed games. On the switch is the only time players are allowed to stop for a drink. If you don't get a drink then, you can't just stop and get one whenever you are thirsty. I have some students who think they are showing me how tough they are by never wanting to take a drink break. This is a recipe for cramps and failure. Of course, too much of a good thing can be harmful as well. Gulping gallons of water can lead to uncomfortable fullness, too many bathroom breaks/interruptions, and in extreme cases, extreme consequences too unpleasant to mention here. Okay, I will mention: yes, people have died from drinking too much water. A good strategy is to sip at every opportunity and drink when thirsty. Also take a drink of water if feeling hungry - thirst sometimes masquerades as hunger.

Sports drinks - I have already talked about electrolytes and why they are important here. Suffice to say moderation is what we are after. These drinks contain electrolytes, but they also often contain lots of sugar and artificial coloring. I have also found many of my students, like myself, don't care for them or tend to get a stomach ache when drinking them during competition. Not sure why, just FYI.

On to solid nutrition options:

Fruit - bananas, orange slices, frozen grapes, melons, basically any hydrating fruit your child enjoys. I once had a pound of plums disappear at a Jr. Team Tennis practice like they were little round purple bars of gold.
Yogurt - satisfying and easy to digest. Just don't overdo it as many yogurts can be high in sugar.
Nutrition bar - individually packaged, easy to toss in the bag, doesn't need a cooler. What we are going for here is a slow, even release of energy for your player. Nibble, don't gobble.


The Free Lunch
Tournaments often provide lunch for the players. What is offered varies widely. I have seen everything from cold cut subs/sandwiches to pizza to meat-and-three (it's a southern thing). You want to avoid the afternoon slump or worse, cramping, that can arise after eating a heavy meal for lunch. Definitely no fast food. Avoid anything that will require lots of effort for your digestive system. This diverts energy from other parts of the body which may be needed for chasing down lobs! You can call the tournament director and ask what they will be serving, or just bring your own snacks JIC (Just In Case). If it were up to me, I would offer cold cuts/subs for all tournament lunches. Good combination of carbs, protein and veg, not too heavy, and most people like them. When our facility hosted the Jr. Team Tennis Nationals recently, they also had a smoothie vendor. Smoothies are a tasty and more or less healthy snack option, but again, enjoy in moderation.

What NOT to eat is so much easier. Avoid the usual suspects:

Fast food
Sweets
Fried food
Soda

Also avoid any foods new to your player that might be offered at the event. The chicken Caesar garlic wrap with tzatziki and quinoa may seem healthy and smell delicious, but tournament day is not the day to test if your player's stomach can tolerate whole grains and Greek food.

Bottom line: during the tournament, you want to eat like a world class athlete.
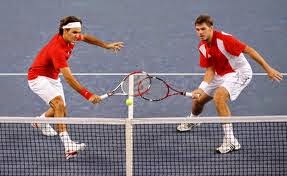
 WWFE (What Would Federer Eat?)


Tuesday, November 18, 2014

Serve Smarter

PTR certified teaching professional Marcin Bieniek has some great tips on serve instruction in the November/December 2014 issue of TennisPro Magazine. The tips are not so much technical info as how to include the serve in the lesson plan in such a way that students are working on serves more effectively. If you are a PTR member or subscribe to the magazine, good for you - read the article! If you don't have access to it, I want to just give a couple of highlights.

My biggest takeaway is Coach Bieniek's recommendation to start as many points as possible during the lesson with a serve. I need to do better on this. I have many young beginners for whom getting the ball over the net and into play is a challenge, much less getting a serve in. So we begin many activities with a bounce feed or a coach feed. My logic is to get more 'touches' (in the soccer parlance), because if we waited for a serve to be 'in', we would be waiting a looooooong time. However - sometimes we go way too long without at least trying some serves. My bad. I have been thinking this week about how to incorporate serves into my beginner lessons with out slowing play to a crawl.

I sometimes have my students try their two allotted serves. If they double fault, rather than awarding a point to the opponent, I toss in a third ball as a serve. This way they can keep hammering away at the serve, but there is still a chance there will be a rally if I throw a ball in, rather than teams constantly winning games by virtue of a series of double faults by their opponents.

I also sometimes have my students aim for the correct service box, but also instruct the returner to play anything they can get to if it comes over the net and into the singles court. I have the returner call it 'out' to make sure they know it is out even though I have asked them to play it anyway. Jury is still out on whether allowing them to play 'out' serves is worth the trade-off of getting a rally going.

Coach Bieniek has a couple other lesson plan tips that I like. One is to vary the placement of the serve portion of the lesson, rather than always having it at the beginning or the end. Another is to pair serving with recovery and hitting the next ball. I agree with him that often players are so enamored of their serve, they forget to continue to play the point! I will be elaborating on both of these in future blog posts.

Do you have any tips on improving the serve for young beginners without bringing the learning process to a screeching halt?

Monday, November 17, 2014

14 Tennis Pun Dog Names

Tennis lovers don't just rescue cats - they rescue dogs, too, so here ya go!
(scroll to end for photo credits)


Photo credits all from Flickr with Creative Commons licenses.

Bobby Diggs:
Untitled by Tomas Hellberg license here

Maria Shar Pei Pova:
Fawn Dilute Chinese Shar Pei Puppy Dog, Aspen, Playing With Tennis Ball by Beverly license here

Novak Djokofetch:
Playtime by Ashtyn Warner license here

Lleyton Chewitt:
Diesel and His Tennis Ball by Hannah Kemp license here

Fangcesca Schiavone:
Black and his Ball by Jason Paluck license here

Mary Jo Furnandez:
Sheltie Monster by Alex Valentine license here

Lindsay Davenpup:
Too Many Toys by Alden Marchman license here

Evonne Droolagong:
Biba the Golden Retriever 3 by abuakel license here

Caroline Woofniacki:
dunlop puppy by pmin00 license here

Andre Wagassi/Steffi Grrrraf:
Two German Shepherds with tennis balls by Damian Synnott license here

Fabio Dognini:
Drop It! by Paul Long license here

Wagneska Radwanska:
hey lucy by Sherman Mui license here

Boris Barker:
Tennis Ball Shugi by TCL8TO7 license here

Eugenie Poochard:
Fetchin by Matthew C. Wright license here

Sunday, November 16, 2014

31 Tennis Pun Cat Names


Dogs get more press for their love of tennis (balls), but that doesn't mean cats can't join in the tennis fun. Get inspired when naming your next rescue.

Ladies first:

1. Meowtina Navclawtilova
2. Purrena Williams
3. Furia Sharapova
4. Martina Hinghiss
5. Lindsay Davenpurr
6. Pam Shrivepurr
7. Monica Selhiss
8. Samantha Stospurr
9. Jennifur Catriati


10. Simeowna Halep
11. Karolina Pusskova
12. Sabine Lislicki
13. Cattison Keys
14. Victoria Catarenka
15. Concheetah Martinez
16. Pounce Casals
17. Meowreen Connolly Brinker
18. Mary Furillo


and the gents:

19. Roger Federfur
20. Pawfael Nadal
21. Stan Clawrinka
22. Andy Furry
23. Tomas Purrdych

24. Jo-Wilfried Longclaw
25. John Hissner

26. Meowat Safin
27. Cats Wilander
28. Rene LaClaws


29. Pawncho Gonzales
30. Marcos Bagcattis
31. Pawfur Ashe

Tuesday, November 11, 2014

Bounce Tennis

Thanks to this recent article I will be trying Bounce Tennis soon with my intermediate and higher level students. I had seen the Djokovic video that inspired the article but had forgotten all about it.

Players play mini tennis (service boxes only) singles or doubles. If you have odd numbers, extra players can wait at net post and feed in when there is an error; King/Queen of the Court style; or when one player reaches X number of points.

Ball must bounce on player's own side before passing over net. That's the only difference between Bounce Tennis and regular mini-tennis. Watch the video if that seems confusing.


Tuesday, November 4, 2014

Touch Meister

This drill is a modified ball machine drill, originally named 'Mr. & Mrs. Touch', from Inaki Balzola in the Sept/Oct 2014 issue of TennisPro Magazine. I took liberties with the name to avoid giggle fits with my junior players. As you might suspect, the goal is to improve touch shots at the net. Good for all levels, minimum 4 players. You will need some spots or other court markers.

Two players are at the net. Remaining players are at the opposite baseline divided equally among ad and deuce sides. Coach is behind net players feeding from the T. Mark off two target areas in the outer net quarter of each service box. In other words, the quarter of the box closest to net and alley.

Alternate feeds to baseline players ad/deuce. Baseline players must hit cross court. Net players attempt soft volleys to targeted areas.

Each baseline player gets three feeds. Points awarded to baseline player when net player misses. Points awarded to net player when baseline player misses, or when net player's volley hits inside target.

You can run this for a specified time period, or until one player reaches X points, then rotate until all players have had a chance at both net positions.

Tuesday, October 28, 2014

Serves and Overheads

Here's a great serve and overhead exercise from Steve Smith at Tennissmith.


Tuesday, October 21, 2014

Your Serve, My Serve

This activity from Cosmin Milhoca is similar to Tina Hoskins' Serve Everlasting drill. Here it is verbatim from Cosmin's website, Web Tennis Drills:

Your Serve, My Serve

Two players (A and B) play a game where each point starts with a serve from behind the baseline.
One of them serves - let's say, player A. She is going to keep serving, alternating sides after each point, until her serve is broken (that means she loses a point on her serve).
Once that happens, player B will begin serving - first point from the right (second from the left and so on). Now, player B will continue serving on each point until her serve is broken.
Scoring: Every time a player serves and wins a point, they count it; players don't get points for breaking their opponent's serve. Play first to 11 (counting only the points won while serving).

Tuesday, October 14, 2014

Forehands R Us

Here's a recent lesson plan I concocted for working on forehands. The serve may be 'the most important shot of the game', but forehands are the ones we hit the most (80% of shots by some estimates). So we spend a lot of time on forehands on my courts.

Warm-up
Spread players out around baseline based on how large of a group you have. One player, or the coach, is in front of the group. Front player leads with 10 forehand shadow swings. All others copy him/her. Each player takes their turn as leader. In a large group you will have hit 50 or more shadow swings by end of this warm-up. Make sure players begin with and return to ready position; are taking the racquet back properly; have a point of contact out in front; and a good quality follow through. I also ask my players to track the ball with their non-dominant hand. Coach circulates among players during warm-up, fine-tuning swings as needed.

Skills Challenge
Two players are at service line (ad/deuce). Place two spots for each player: one where the player stands/begins and another at where forehand should bounce. This will be at 1-2 o'clock for righties and 10-11 o'clock for lefties, about racquet length distance away from player. Helpful if the bounce target spot is the same color for both players and different from the beginning spot, so you can remind the tossing players to aim for the 'red' spot or whatever color.

All other players are across net at service line. If you have a large group, divide in half. These players are taking turns tossing underhand balls toward bounce target of player straight ahead. Toss must be good quality with step from opposite foot, similar motion they will be using when hitting. Object is for tossing players to hit bounce target before hitting player hits five forehands in. Ball hitting bounce target is instant win for tossing team. Once a win is achieved, two new players rotate over to hitting positions.

Continue until all players have had a turn at hitting. Repeat, this time tossing cross court. Repeat both straight ahead and cross court toss, this time moving hitting players back to baseline.

I continue this activity until we are about halfway through our lesson time. Then we warm up serves, and finish with some live ball points.

Note: some players, when on tossing side, are determined not to let the hitting players 'win', and toss some really ugly stuff. Reinforce their goal is to hit the target, not to hurl fastballs. Insisting on good quality form for underhand tosses goes a long way toward eliminating near-impossible feeds, but still - keep an eye on this.


Tuesday, September 30, 2014

Net Work

This simple but effective drill idea is from the 3rd Toad tennis blog. Its purpose is to get players comfortable with coming in to the net. Works for both singles and doubles. Also great for fitness and footwork.

Two players rally from the baseline cooperatively. After the third rally, one player moves in to the net and point is played out competitively.

For more than two players, divide players into more or less equal groups and have them rotate in after every point. Continue until all players have had a chance at both positions.

Variation: baseline player who wins point trades places with net player.

Tuesday, September 9, 2014

Group Serving Lesson Plan

Here's a serve lesson plan great for larger groups.

Warm-up
Form two teams. Station each time at the service line. Players take turn tossing balls overhand across the net into the correct service box (cross court). Continue until ball hopper is empty.

Ball pickup/water break

Skill activity: modified Clean Sweep
Teams at service line. One team member is sent across net cross court from rest of team. Players take turns serving from service line. If serve is in, team member across net retrieves ball and places it on the ground at net as a scorekeeping device (one ball = one point). Server now runs over to other side of court and is now score keeper. Next player in line now serves. Play continues until one team achieves 10 points.

Coach is stationed near servers. Teaching opportunities with groups between rounds and during serves with individual players.

Ball pickup/water break

Repeat above activity moving players back, now hitting serves from halfway between service line and baseline. Have teams switch sides of court to get practice serving from both ad and deuce.

Ball pickup/water break

Final repetition from baseline. Team winning best two out of three wins.

We had time at the end of our one-hour clinic for a round of Champs v Chumps which served as our cool down. They had done enough serving for one day. :)

Safety Tip: Be sure players take care not to run in front of servers or score keepers to avoid being hit by balls or slowing the game down.

This is a good cardio workout in addition to being a good serve drill. One player commented it 'wasn't fair' because the other team had one more player. I explained to them that was only an advantage if the other team was serving better. Players soon learned the more efficiently and quickly they ran this activity, the quicker they would win. It was fun to watch them manage themselves, encourage each other, and basically just figure stuff out on their own.

Tuesday, September 2, 2014

Forehand Lesson Plan

Here's a complete one-hour lesson plan including warm-up, instruction, and match play using drills that have been posted here previously.

Warm-up: Figure 8

Drop & Hit
Ken DeHart's drill is a simple and effective way to introduce using a tracking arm when hitting the forehand.

Four Ball
Adapt the original drill and focus only on forehands for the player working with the coach.

Forehand Challenge
Using quick-moving lines or a forehand caterpillar, all players take turns hitting forehands (fed by coach) using the tracking arm and shoulder turn. For every forehand that lands in playable area, players earn a point. As a group they are trying to earn X number of points. Forehands not using the tracking arm do not count toward the total. Extend this activity by repeating, having each individual player trying to be the first to earn the required number of points.

Match Play
Coach observes match play, encouraging/reminding/reinforcing use of tracking hand on all forehands.

Tuesday, August 26, 2014

Nine Lives Backhand Lesson

When I blogged about the Nine Lives game recently, I mentioned how easy it would be to adapt it to a variety of situations. Here's one I used recently for my red ball class. Beware, it's the mother of all progression drills, so adjust accordingly. You will need some clothes pins.

Pick a skill, any skill, that you want to work on. Recently it was a backhand day. So I used Nine Lives like this.

Players count out nine pins and pin them to the top of the net. Players stand at the T in the backhand position. Coach hand-feeds backhands to players from close proximity. One pin is removed each time the backhand is hit into play. Goal is to remove all pins. When this is done, end Round 1 and get a drink. Pick up balls if necessary.

Round 2: get nine more pins and pin on net. Move players back to baseline and repeat.

Round 3: you guessed it - nine more pins. Coach moves to other side of court across net, but still feeding by hand. Repeat.

Round 4: More pins! Players now start from ready position at baseline. Repeat.

Round 5: More pins! For the final round, coach feeds with racquet instead of by hand. Repeat.

You should have a pretty good stack of pins by now, 45 if my multiplication skills have not completely deserted me. You can do some fun stuff with the pins your players are accumulating, such as:

  • For group fun, just make a big pile of them somewhere to be admired and counted after the lesson.
  • For a more competitive spin, have each player put any pin they earn onto their shirt. Player with most pins at end of lesson wins.
  • For the Lego crowd, let them make something creative with the pins. This student made a dragon.

Tuesday, August 19, 2014

Team Triples

Team Triples is a twist on the Triples game, a player favorite. I saw it mentioned in the August 2014 issue of Tennis Industry Magazine. I love their idea of making it a team format for a tournament. I especially love the idea of playing it with orange balls!


To recap how Triples works: there are three players on each end of court forming a triangle - one at the T, and two at the baseline where the singles sideline intersects with the baseline. Players self-feed with a bounce feed. Both sides rotate one position after every point. Full court (including alleys) is played. First team to X wins.

Using a slower ball on a full 78-foot court introduces a fitness element. Having the players self-feed introduces a strategy and directional control element.

The article did not give details about who feeds or how, other than suggesting players feed rather than coaches. When we play regular Triples, I usually feed straight ahead to the player across the net from me at the deuce side baseline. We play first to X, best two out of three, and the players rotate positions after every point, so someone new is always getting the feed. I suggest a similar strategy here so that a different person is serving every point. So consider whomever has rotated into the deuce side baseline position the feeder. Avoid having the player at the T as feeder.

As for scorekeeping, because you are rotating players after every point, I would go with a 'first to X' or rather than a traditional 15-30-40 scoring method. If using a 'first to X' scoring strategy, alternate teams feeding with each new game. If you want to play timed rounds, you don't need to have an end point to the game. Whichever team has the most points at the end of the timed round, wins. But with this scoring strategy, you may want to alternate which team is feeding with every point, so that one team is not feeding the entire timed round.

No need to organize a big tournament to enjoy this activity. Consider using this as a warm-up if you have six or more players in your group. If more than six, that's fine - just have the extras rotating in since there is a rotation after every point and things move pretty quickly.

Tuesday, August 12, 2014

Nine Lives

I found this game on the Tennis Resources site. They had it in a doubles format, but I can see
using it in a variety of ways.

Teams start out with nine points each. Coach feeds in the first ball. Players play out the point. Losing team loses a 'life'. Play continues until one team is out of lives. Play best two out of three, with coach feeding a different team each round.

How about this singles variation, especially if you have odd numbers or a larger group: One player is on one end alone; all others are at the other end. One by one, they take on the singleton. All players begin with 9 Lives, losing one each time they lose a point. Player with the most lives when someone gets down to zero is the new singleton.

Tuesday, August 5, 2014

Volley Control Drill

Lauren Stewart's third suggestion for 2.5 drills is this volley drill. In addition to consistency and backhand skills, she said beginners need to work on their volley skills. You will need some throw down targets.

Players pair up away from the net, facing each other 5-10 feet apart. One partner will be tossing balls for the other to volley. The throw down target should be just in front of the volleying partner as a reminder to take a step forward with each volley (make sure they recover after hitting). First team to get to X in a row, wins. Change roles and repeat.

Note only one ball per team is used. If they miss, they have to chase down their ball. Great for warming up!

Progression

  • Use net between partners
  • All forehands
  • All backhands 
  • First ball racquet fed, not hand tossed
  • Score resets to zero if any misses


Tuesday, July 29, 2014

Four Square Jr.

Four Square is a ball machine drill by Inaki Balzola in a recent issue of Tennis Pro magazine. If you
don't have access to a ball machine, YOU are the ball machine :)

Balls are fed from the T. Feeds alternate between ad and deuce baseline. Players are on opposite baseline in two lines (deuce and ad). Place a cone or spot at the hash mark between them.

Opposite end of court is divided into four spaces. Ad service box is #1. Deuce service box is #2. Ad back court is #3. Deuce back court is #4.

Each player in line hits four balls, recovering to touch cone target after every hit. Player cannot hit into the same numbered square twice in a row. Player gets one point for every square hit, unless they hit the same square twice in a row, in which case they get ZERO points for that turn.

Play for a set time period or until machine/hopper is empty. Player with most points wins.

Variations

  • Subtract a point for hitting into the net.
  • Points earned equal square hit into. 1 point for square 1, 2 points for square 2, etc.
  • Extra points, or instant winner, for hitting all four squares in order 1-2-3-4.
  • All shots must be forehands, backhands, slice, topspin, whatever you want to work on that day.

Tuesday, July 22, 2014

Breakout

No, it's not Ebola, or acne. Breakout is my own mash-up of Jailbreak and Net Monster.

All players begin on one baseline. Coach feeds ball to one player at a time. If player misses, he/she comes over to coach's side and plays at the net. If net player hits a winner, he/she is back in line.

You can accommodate 5-6 players at net safely on 60- or 78-foot court; 4-5 on 36-foot court max. If you get more than this, don't do it - it isn't safe. Just have the extra players wait until a spot opens up for them when another player hits a winner and rejoins the line.

Goal is to be the last player standing on the original end (not the net side) and hit a ball in that is not intercepted by the net players.

Friday, July 18, 2014

Consistency Rally

Here's another rally drill from Lauren Stewart at The Woodlands. Again, suggested for 2.5 players but perfect for beginners of all ages. Another trait of 2.5 players is that they lack consistency. There's a drill for that. :)

Players pair up with a partner across the net and cross court. Play within the singles lines. Pairs/teams earn one point for every five ball rally achieved. First team to 5 points, wins. Switch sides (not ends) so players can get proficient on both sides of court.

If you have odd numbers of players, divide into teams and have them rotating in for whoever makes the error.

Progression
Play within service boxes with red or orange balls for easiest or for a good warm-up.
Start on 60 foot court with orange ball; progress to full court with green, then yellow balls.
Allow alleys. Two points for any ball landing in alley.

Thursday, July 17, 2014

Backhand Rally

Here's the first of several drills from the recent USTA South Carolina coaches workshop at Cayce
Tennis & Fitness Center. This one is from Lauren Stewart, tennis pro at The Woodlands in Columbia SC.

Lauren's presentation was about drills for womens' teams of various levels. But I found all could easily be adapted for junior players.

Lauren had her drills organized by playing level: 2.5, 3.0-3.5, and 4.0. She said 2.5s often struggle with or avoid hitting their backhands, so she suggested this drill to build skill and confidence.

Partners pair up across the net from each other, behind the service line. One player may only hit backhands. The other may hit any shot they like. Players rally straight ahead. Ball must land in service box. If the designated backhand hitter hits something other than a backhand, that's a point for the other player. First to X points wins. Round Two: switch to hitting cross court.

Progression: move farther back or switch to a faster ball. For examply if you are hitting orange ball, change to green.

Sunday, July 13, 2014

The Case For No Cut

Lots of great info from the USTA South Carolina tennis coaches workshop I attended recently. New drills forthcoming. In the meantime I am taking a moment for a brief rant about 'no cut' tennis teams. If you are not into rants, just be patient and new drills will be posted over the next few days.

Rant Commences Here

When the workshop broke for lunch, I was fortunate to be sitting at a table with lots of great tennis folks
These fun portraits happen when you get
inducted into the SC Tennis Hall of Fame
including Barbara Jones from St. George SC and some of her pals who have done amazing things getting youth tennis going there. SC Tennis Hall of Famer Bernie McGuire also joined us. Bernie is the tennis coach at a private school called Hammond in Columbia, SC. I had never met Bernie in person, but had worked with him by proxy, coordinating a friendly with some of his players last fall through his assistant, Bob Crab. I introduced myself and we talked about Hammond a little bit. He mentioned he had 71 girls on his no cut tennis team.

Seventy. One.

While that is sinking in, let me 'splain. In case you are not familiar with 'no cut', it's exactly what it sounds like. No one is cut. Anyone can join the team, regardless of skill level. USTA has an official No Cut program and encourages schools to participate because obviously this has the potential to increase the tennis playing population. But in my experience, schools are reluctant to embrace no cut. Last year another coach (who will remain nameless) summed it up when she said she didn't like no cut because they didn't have enough coaches to handle large groups of kids. Okay, I get that. But she also had some tasteless remarks about the skill levels of the kids that no cut attracts. She basically didn't have the personality or patience to coach beginners, is what it boiled down to. She'd rather just cut them.

With this conversation in mind, I asked Coach Bernie how he handles staggering numbers like 71 kids on a team. He said he just recruits volunteer coaches through parents, friends and staff members who have tennis skills. And that was that. No complex methods or explanations. No whining or complaining. Just asks for help, finds help, finds a way to not turn away 50 kids who want to play tennis.

Doesn't that sound simple? Yeah, but you and I both know it's never that simple. It's a lot of work. But if you have what it takes, the rewards are worth it. Reach out to your state USTA reps, your local tennis professionals, parents, staff, neighbors. Ask for resources. Ask for help. Put a racquet in a kid's hand. The magic of no cut is providing an outlet for kids to play a sport whose main roadblock to playing a sport is the dread of being cut, of being told you're not good enough. High school has enough soul-devouring experiences over four years. Anxiety over making a sports team, which is supposed to be about playing a GAME for crying out loud, supposed to be FUN, should not be one of them.

And all you parents out there worried a no cut team will dilute the coaching talent too much and your little Andy Roddick wannabe won't get his share of coaching time - you and I both know the junior development coaching does not occur on the high school courts, so get over it. If you don't know that, and you're depending on the high school team experience to get your player to Wimbledon, you don't know much about tennis. You're doing it wrong.

Rant Concludes Here

So props to Coach Bernie and all the other great no cut high school teams out there. I'm impressed. You're doing it right.
Photo from USTA Midwest section No Cut page


Monday, June 23, 2014

Serve Caterpillar

I can't believe I haven't posted this activity before, but I can't find it anywhere. I use it frequently with many variations. You will need some spots.

Throw down the spots outside the court sidelines about five feet apart starting at net position and progressing until the last spot is behind the baseline in the usual serving position. Players take turn serving from positions within the court aligned with the spots, starting with the 'head' of the caterpillar (the position closest to the net). Players move back one position for each serve hit in. A missed serve means player goes all the way back to the first position closest to the net. First player to reach baseline and hit a serve in, wins.

This game is easily converted to a team activity, with players on each team taking turns hitting. In other words, no fair having the same person on the team hitting all the serves! Whether playing individual or team, play best two out of three and switch sides (deuce/ad) each round.

Hint: when you are laying down the spots, try not to put two of the same colors together. It gets confusing trying to remember who should be serving from which spot/color. Having each position a different colored spot helps everyone keep track.

Friday, June 20, 2014

Getting The Word Out

How do you get the word out about your tennis business? I teach at two county-owned facilities. We use a variety of methods, low- and high-tech.

Low tech:
  • County recreation catalog - it's very well done and comes out a few times a year. I listed this under Low Tech because although the link takes you to a PDF online, it is also printed and mailed in paper format. Tennis is listed along with all the other activities offered by the county. The catalog gets in front of lots of eyeballs.
  • Flyers - both facilities have different flyers describing the various tennis clinics offered. 
High tech:
  • Websites - both facilities have their own websites here and here.
  • Social Networking - both facilities have Facebook pages here and here. One also has a Twitter account @caycetennisfit and a Google+ page. Facebook is updated fairly often; the others, less so.
  • QR Codes - one facility has used QR codes on flyers in the past. Not sure if they have any effect, but it costs nothing to include them, so if we have room, we use them.

Wednesday, June 18, 2014

Slam Bang Serve & Return

I cooked up this drill idea the other day while running a serve caterpillar. I often have players returning serve during serve drills to reduce time spent in line and of course work on the second most important shot of the game. This drill will put extra pressure on the returner when the server is serving from up close.

Two players face each other across the net. One is serving; the other is returning. Serving player is doing a serve caterpillar, meaning they are working their way back from the net to the baseline. Server is serving from four stations: mid service box, service line, 60 ft. blended line/no man's land, and baseline. Returning player is just trying to get their own returns in play. Players do not play out the point. Activity should move quickly to get new players rotated in.

One point is awarded for every ball correctly hit. Server has one chance per position. Any misses by the server = a point for the returner. Winner stays and switches roles. Ties are broken with a serve from the baseline until someone wins.

Since players do not play out point, up to 4 players could be playing simultaneously per court with additional players waiting to rotate in.

Tuesday, June 10, 2014

Tennis Teaching Aids: The Sky's The Limit

Here's how much of a TCN (Tennis Coach Nerd) I am: recently I was watching one of my guilty pleasure TV shows, What Not To Wear. I know, I know, this has nothing to do with tennis, but stay with me here. In case you haven't seen it, this is a makeover show. A lucky person, usually female, is selected to receive a style makeover from industry experts. The makeover includes a $5000 gift certificate used to update the recipient's wardrobe. As I was watching, I couldn't help but wish I were the recipient. But instead of imagining myself roaming the boutiques of New York City, I thought of the new OnCourtOffCourt tennis supply catalog. NERD!

Have you received the new 20th anniversary catalog? If not, you can download one here. Lots of great toys. If I had $5K to spend with them, here's what I would buy, in no particular order.

Friday, June 6, 2014

Absolute Serve

Here's another great drill idea from Cosmin Milhoca at WebTennisDrills.com. It is similar to the Keep It Deep serve drill, but adapted for a single player for either practicing alone or during a private lesson.

Player serves out a game against an imaginary opponent. First serve must be hard enough that it bounces 2 times or fewer before hitting back fence. Second serve may bounce 3 times or fewer. If either of these conditions is not met, serve is considered a fault. Double fault = point for 'opponent', natch.

Sunday, May 25, 2014

Cardio For Two

This drill is from Cosmin Miholca's site webtennisdrills.com. Excited to try it soon with my students.

Players face each other across the net using only one half of the court. Balls must stay in service boxes; in other words, players are playing straight ahead. One player must allow every ball to bounce before hitting it. The other player must alternate between bounce hits and volleys. Failure to do so will award a point to the other player. First to 7 points wins; then reverse roles.

You could do this cross-court to mix things up a little. 

Thursday, May 15, 2014

DTL Champs

DTL (Down The Line) Champs is from Inaki Balzola, in the May/June 2014 issue of TennisPro Magazine. It is presented as a ball machine drill.

Machine/pro feeds from service line. Players are arranged on ad and deuce baseline across net. Players hit one approach, then two volley shots. They are trying to hit targets straight ahead/down the line at the opposite baseline. One point for balls hit just behind the service line out wide; two points for balls hit at baseline near the hash mark, and three points for any hit in the deepest wide corner where singles line and baseline intersect. See chart below for a way better explanation of the points targets.

Players rotate into opposite lines to get experience hitting from both sides of court. Player with most points at end of round wins.

Wednesday, May 14, 2014

Net Gain

Net Gain is my name for Alejandro Ciffoni's series of net drills in the May/June 2014 issue of
TennisPro Magazine. You will need at least four players.

Two players are at net. The other two are across the net at the service line. Goal is to rally 8-12 times with the player straight ahead of you.  Net player is aiming for a spot (real or imagined) in the middle of the service box. Net player should attempt to hit a variety of shots to the returning player's backhand and forehand. Once rally goal is met, players switch spots.

When all players have met the first goal, move returners location to halfway between service line an baseline. Net player is now aiming for service line area. Repeat exercise until all players have had a chance at both positions.

Finally, move returners to baseline. Net players are aiming for the mid-court area.

Remind your players this is a cooperative activity to achieve the rally goal, not an opportunity for the net player to blast winner after winner.

If your players are not to the level where they can return these volleys effectively and maintain a rally, set up a generous target for them to aim at instead and make it a target goal rather than a rally goal.

Tuesday, May 13, 2014

Forbidden Zone

This doubles drill is from OnCourtOffCourt. It can easily be adapted to work on a variety of shots and singles as well.

Mark off the middle third of the court from net to baseline. This is the Forbidden Zone. Play doubles. Any shots landing in the middle third mean a point for the opponent. This version will help players work on hitting angled shots.

Now change the rules so that the middle zone is the preferred zone and the outside thirds are forbidden. Keeping the ball in the middle of the court can be a sound strategy in both singles and doubles.

Overall, it is important that players are able to control direction, the third layer of our tennis skills pyramid.

Monday, May 12, 2014

Return of Doom

Here's a lesson plan to focus on the 2nd most important shot of the game: the return of serve.

I used my Ropezone to divide the court diagonally from ad net to deuce baseline. All players are on opposite baseline. I fed a simulated serve into the deuce service box. We then played 21: players are trying to be the first to get at least 21 points. They get 2 points for returns hit cross court and 1 point for hitting down the line. If they are hitting a lot of net balls, I may choose to deduct one point for any net balls. Anyone landing on 13 points had to go back to zero. First player to 21 wins. Then move Ropezone to opposite corners, move players to ad side and repeat.

Now that the players have warmed up their returns, let them warm up their serves. Commence time round round robin, singles or doubles. Score game as usual EXCEPT any missed return of serve is GAME OVER. Keep track of games won per player. Player with most wins at end of round robin wins. You could also keep track of how many players lost a game by missing their return. Player with fewest misses wins.

Wednesday, April 30, 2014

Battle Spots

Battle Spots is a target activity similar to Battle Cones posted here previously. My students and I have a few modifications that we believe improves the game. I saw the original while I was taking the CoachYouthTennis online training sessions.

In both games, the object is to hit your opponents' spots/cones with your ball. I like the Spots version of this game because they are lower profile and less of a trip hazard for younger players. But they are also harder to hit. When we played straight-up Battle Spots with no modifications, it was almost impossible to eliminate all spots. As Ken DeHart has suggested, better to try to be the first player to hit ANY spot, and win. Another problem I had with this game is that players tended to park in front of or on top of their spots to protect them, and would not move to go after balls and play out the point because there was no benefit to winning the point - the motivation was stronger to protect the spots. However, with one simple modification suggested by one of my green ball students, a version of Battle Spots can be played where the first player/team to lose all spots, loses, and everyone is motivated to both play out the point as well as protect their spots.

Here's a recent lesson progression that worked great in orange, green and yellow ball classes recently.

I used a mini-tennis version of Battle Spots for our ball warm-up as follows.

  • An equal number of spots are put down on each side of the net. I put them about in the middle of the forecourt. 
  • Divide players into two teams. 
  • Teams take turn bounce-feeding and playing out the point.
  • Object is to be the first team eliminate all of your opponent's spots.
  • Spots may be eliminated either by being hit by opponent's ball, OR - here's the modification - whenever a team earns three points. Note: if one team gets three points, other team removes a spot. Team earning three points is reset to zero points. Team removing spots DOES NOT reset to zero and retains however many points they had when opponent got their three. This creates a fun, equalizing see-saw effect.

For added fun and a fitness component, I had both teams playing this game in relay style: player 'hits and gits' - hit one ball, go to end of team line, next player plays next ball. This avoids the dreaded waiting in line syndrome and keeps everyone moving.

After the mini tennis version was completed, we took a water break. I moved the spots back to the T area and we played it again from the baseline.

We played this as relay singles, but it could easily be played as doubles.

Tuesday, April 29, 2014

Flingerz

My amazing, unparalleled orange ball class came up with this fun warm-up idea recently. They named it, too! You will need some plastic throw-down spots, the kind with a large hole in the center.


Players pair up across the net from each other. One partner is the Flinger. The other is trying to catch the flung spots on the end of their racquet. See who can get the most catches during a set time period, or which team can get X number of catches first. Switch roles, repeat.

Monday, April 28, 2014

Sprint Caterpillar

I saw this warm-up in a video on Steve Smith's site www.tennissmith.com. Works for all ages and abilities.

Set up a cone, just beyond one doubles sideline. Players jog lightly in a line from the opposite
doubles sideline to the cone. As they reach the opposite sideline and head back to where they started, when the last player in line passes the cone (red arrow), that player sprints to the head of the line (green arrow).

Continue until all players have had a chance to be the sprinter.

Tuesday, April 22, 2014

Center Field

photo from here
Thanks to George Estes for this drill. George is a fellow teaching pro at Cayce Tennis and Fitness Center. His students are mostly adults, but this drill will work for junior advanced beginners and up when working on lobs and doubles. Perfect for when you have five or six players but don't want anyone standing idle.

Four players take regular doubles position on court. Fifth/sixth players stand behind baseline. These baseline players' only job is to play any lobs or feed lobs to start point.  If you only have five, coach is sixth player behind baseline, starting each point with a lob. If six, one of the two lob/baseline players starts the point with a lob.

Scoring strategy of your choice. First to X, best two out of three works well for most court drills.

Thursday, April 17, 2014

Rollerball

Bouncy balls cheap at the dollar stores this time of year
photo from coolsciencedad.blogspot.com
Rollerball is a fun warm-up lifted as-is from the CoachYouthTennis site. You will need a large-ish ball such as a rubber, dodge, soccer, or basketball. If you want to see a video of this activity, take the coaching course at CYT and it will appear in lesson 5.

Two players, or two coaches, stand at net posts. They roll the large ball on the ground between them. Meanwhile, all other players are at the baseline, rolling regular tennis balls on the ground toward the net. Object is to hit the larger ball.

When I did this recently, I had six red ball players on court. Two were rolling the large ball; the other four were at the baseline. I gave them 30 second timed periods and had them keep track of how many times they were able to hit the larger ball. We rotated pairs in to roll the large ball. Player at the end of the three rounds with the most hits was our winner.

Make sure your players:

  • stay behind the baseline to roll the tennis balls toward the net
  • keep the tennis balls on the ground
  • roll with a good quality underhand motion, stepping with opposite foot, hand releasing toward target, very similar to bowling which many of them have done thanks to Wii.

Friday, April 11, 2014

Progression Infinity

There's a fairly new website called CoachYouthTennis. It has lots of great info for coaches of all
I use the heck outta my spots
levels. Great for parents, too, who are new to tennis and want some perspective on what they may be seeing during their player's lessons.

As per my usual, I will be mining the info there and testing it on court. Today's post is a complete lesson plan as opposed to a single standalone activity. It has been battle tested recently and I am very pleased with the results. My students enjoyed it thoroughly. I used it in a private lesson as well as in a group lesson with 9 red ballers and also 6 orange ballers (two different clinics, natch). Worked great all times. You will need some spots or some way to mark the court.

Wednesday, April 2, 2014

ROGY Shirts

The ROGY shirts are in! Show your support of the Red-Orange-Green-Yellow tennis progression instruction method.

  • $15 each while supplies last - adult and junior sizes available
  • Special discounts for current students - contact me for details


Monday, March 31, 2014

Kittens and Mittens

Another mash-up today. Title contributed from one of my students - thanks, Zeb! Super flexible, fun for any age and ability. You will need some extra equipment: cones, spots, and some random way of generating low numbers such as dice or playing cards.

Players will hit from yellow cones.
Coach will feed from near/target side.
Set up two cones anywhere you want the players to hit from (yellow cones in photo). At net for working on volleys, at service line for approach shots, baseline for groundies, etc. Cones should be 4-6 feet apart forming a 'goal'.

Wednesday, March 19, 2014

Winner Take All

Winner Take All is a mash-up of several different games. I am sure you will recognize a few of them. I got the inspiration for it one morning while brushing my teeth. That 2 minute timer on the electric toothbrush sometimes seems like an eternity!

Saturday, March 1, 2014

March Drill Contest

March is here, which puts me in a festive mood as I hate cold weather, and March means cold weather is on its way out! Let's celebrate with a contest. Send me your favorite junior tennis drill. I'll post them here. At the end of the month, I'll hold a drawing from the names of everyone who submitted a drill. Yes, you can submit more than one, and I'll enter your name once for every drill submitted. Winner receives a Cayce Tennis and Fitness Center logo hat or tennis towel, depending on winner preference.

On your March, get set, go!


Friday, February 14, 2014

Ultimate Volley Drill

Ultimate Volley Drill by Inaki Balzola appeared in the Jan/Feb 2013 issue of PTR's magazine. It
was presented as a ball machine drill but is easily adapted if you don't have a machine handy. Coach can take the place of the machine. You can do this drill with as few as three students. Students should be able to rally volleys.

Tuesday, February 11, 2014

Tennis Pen Pal Program

Did you ever have a pen pal when you were a kid? One of my elementary school teachers organized a pen pal program for our class. We corresponded with some French students. This was very big doings for a bunch of fourth graders from Dallas, Texas. I remember the experience fondly, even after all these years. Oooh, la la!

Recently I was talking to someone about how Twitter is similar to the old pen pal concept as far as meeting interesting people from all over. That got me thinking about reviving the pen pal idea for my current tennis students. Some of you have already expressed interest in participating. That's awesome, but how to proceed??

Safety first! I will be approaching my students' parents and get permission from those who are interested in participating. We also need to come up with a way of having them communicate with each other that is acceptable to all. Facebook is an obvious choice since so many clubs and parents are already using it. Or, we could go old school and just have them correspond directly via snail mail.

I thought I would match individuals or groups by age and level of player. For example, Red Ball class to Red Ball class, or Orange Ball female player to Orange Ball female player. That way, at least they would have their basic tennis experiences in common to start off with.

As far as what will be communicated, depends on how we communicate. Using technology such as Facebook, I was thinking of group pictures, pictures of fun stuff going on in clinic, reports on tournament/JTT play, school team news, etc. If we go with individual communication via snail mail, that's up to the students and their parents.

This will probably evolve as we go along. Any thoughts or advice welcome - tweet to me @10U10S or leave a comment here. Thanks for participating! Should be fun!

Friday, February 7, 2014

Toe Fencing

Toe Fencing is also from the Quebec PE site. It's a great idea for warm-ups for any size group from 2 players on up. It reminds me of the Gotcha game but doesn't need any bean bags or extra equipment, so hurray!

Pair up players. Pairs hold both of each others' hands about shoulder height. Object is to tag opponent's toes with your toes while of course not letting them tag you!

The site gives a couple of good options for game management: you could either go for highest number of tags in a giving amount of time, or go until someone achieves X number of tags before switching partners.

Wednesday, February 5, 2014

Tusker Tag

Another fun warm-up variation on tag from the Quebec PE site: Tusker Tag. Best for large groups.

Players pair up. All pairs must hold hands or wrists. One pair is designated Tusker. If you have an uneven number of players, include single player as one of the Tuskers also. Give Tusker team a ball. Commence playing 'tag'. Tusker team tries to tag other pairs with ball. Note they are touching other players with the ball still in hand, not throwing ball at them. When tagged, pair is frozen in place and must raise the hands they are holding up into a bridge shape. They may be unfrozen if any other unfrozen pair runs underneath their 'bridge'.

If any hands/wrists become disconnected, that pair is automatically frozen also.

Object is to tag/freeze all players.

Make this game harder by gradually shrinking the playing space. For example, start by using the entire end of court. Then shrink to back court only. Then to service box. Then alley. Any players stepping outside of boundaries are frozen.